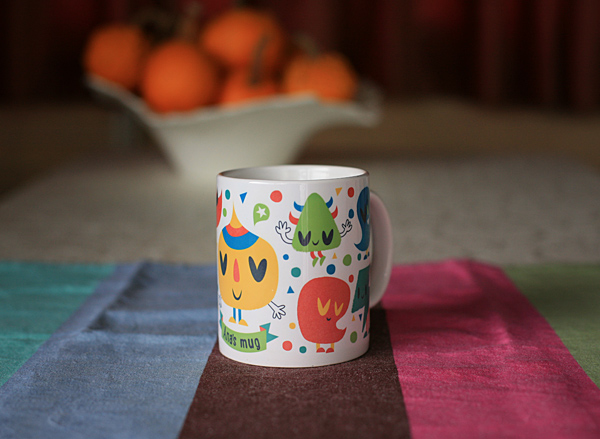
Mugs are part of our everyday life. They help us enjoy most of our favorite daily beverages – from warm coffee and tea to cold milk and ice tea. Can we make the experience even more enjoyable while having our drink from our very own designed mug? Sure we can. It’s always more fun to use a colorful mug instead of the boring blank ones. And it will be also a nice addition in the kitchen. So let’s start designing our mug!
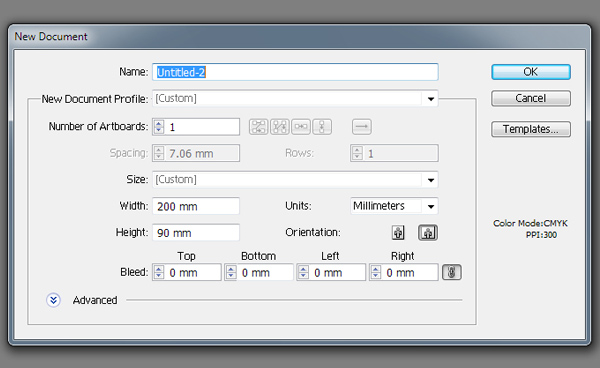
1. Create a New Print Document.
Most of the printable mugs are the same size – so we’ll go with 200mm by 90mm.
2. Start Sketching
Step 1
Let’s make a sketch filled with funny monsters which will brighten our sleepy mornings. Most of the blank printable mugs are white – let’s take advantage of it and make a bright and cheerful illustration on white background. We can also put a small banner at the middle bottom of the mug where you can write your name on it, so everyone (siblings, roommates and co-workers) will know it’s your mug! I am using a pen tablet but you can also draw your sketch on a piece of paper and then scan it and import it to Illustrator.
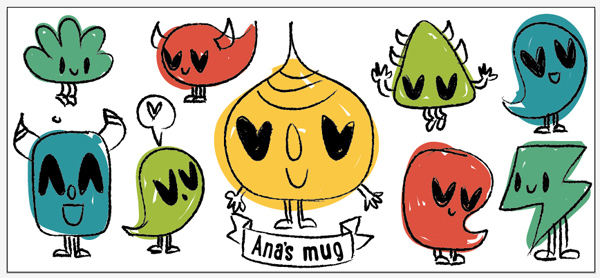
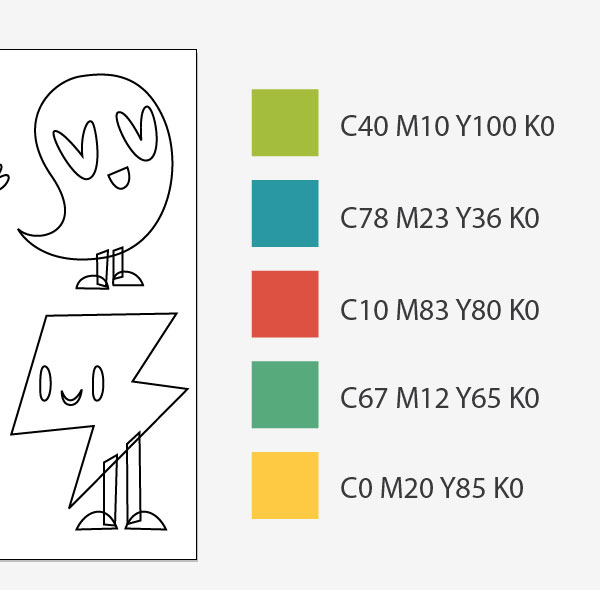
I chose five colors for our illustrations. They may seem little, but later on we’ll add tiny details and you’ll be glad we didn’t add more colors.
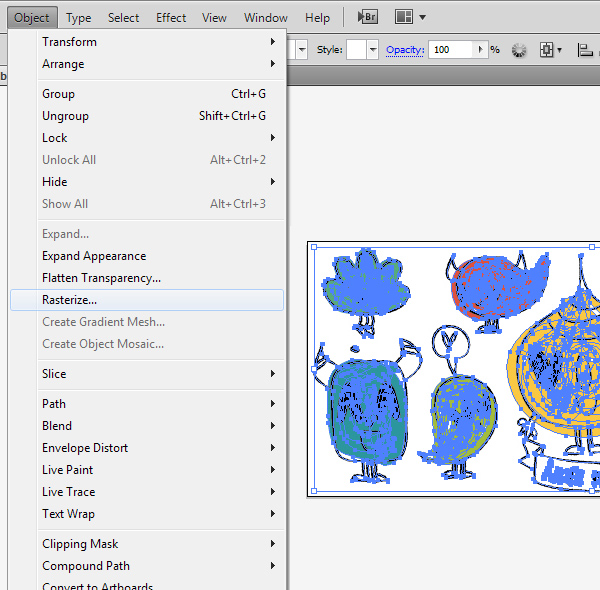
Step 2
Rasterize the sketch. Select the drawing and go to Object > Rasterize.
Step 3
Choose 150 dpi from the dialog box.

Step 4
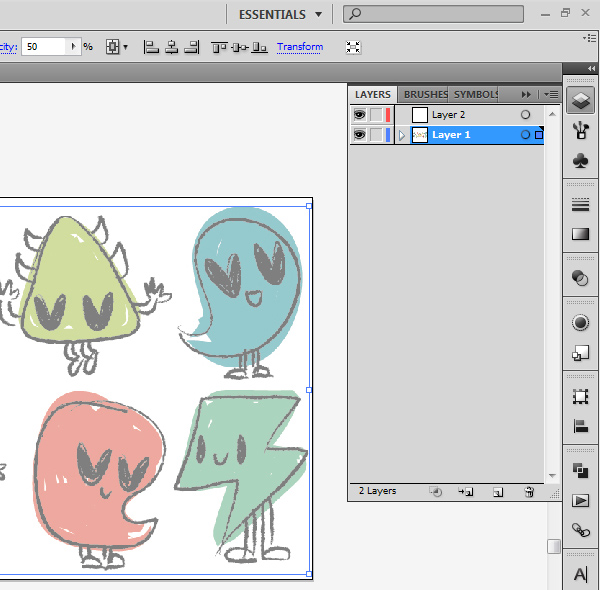
Drop the Opacity to 50% and Lock the layer (Control-2). Add new layer to start creating the illustration. The sketch will be visible enough so we can trace the shapes. Being locked, it won’t bother us on accidental clicking.
3. Trace the Sketch
Step 1
Start tracing! Using the Pen Tool (P), we’ll trace the drawing we made, shape by shape. It requires a bit of time and maybe some nerves if you are a beginner, but trust me it is worth it when you see the final result.
Try not to add many anchor points. This way your lines will be smooth and eye-catching.
Step 2
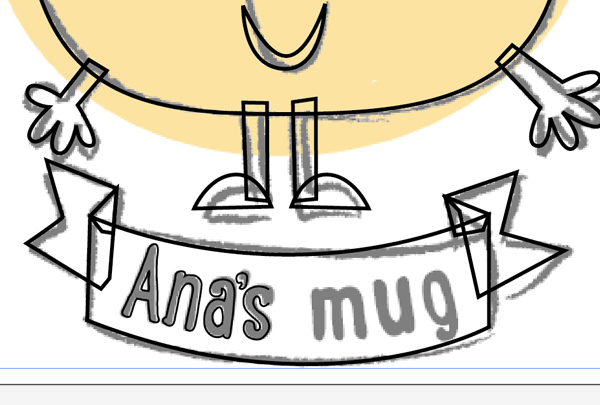
Pay extra attention when you’re tracing the letters. We want them readable, so try to follow the sketch’s path well. You can drop the Stroke Weight to 0.5 points for better viewing.
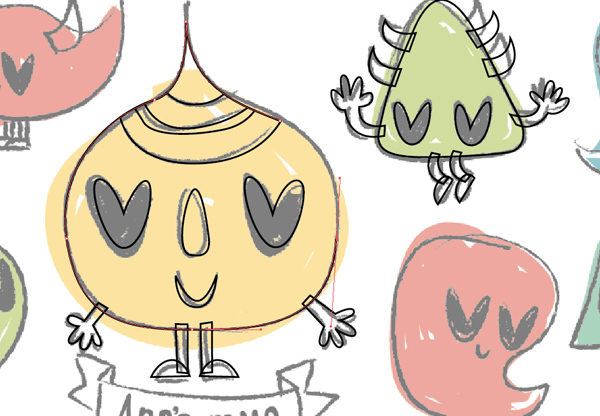
Step 3
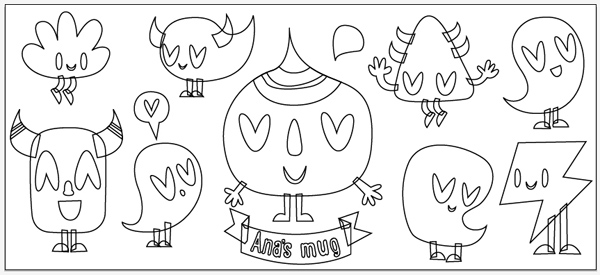
Once you’re done, delete the sketch layer and check your traced drawing. Make sure all paths are closed. Your drawing should look like this.
4. Color Your Design
Step 1
Let’s see how our mug monsters will look in color. We already had a color palette in our sketch so we can use the same colors. My palette contains five colors. I am showing you them in CMYK percentage, but feel free to use any color you want. You can draw little colored boxes next to the artboard so you can pick them easily.
Step 2
First select every monster’s body and color it according the sketch. It should be easy as pie since we have five color palette. Just select the body shape and using the Eyedropper Tool (I) select a desirable color from our palette or from the Swatches panel.

Step 3
Now that we have colored bodies, it’s easier to continue coloring. We’ll resume with coloring the horns and their eyes. Use dark gray (90%) – that way we won’t have absolute black and our illustration will get a certain retro feel to it.
Step 4
Now let’s color their legs – we can use the same color as the body for their feet, and their legs can be in any other color out of our five color palette. We’ll leave their hands in outline, like they did in those old cartoons.
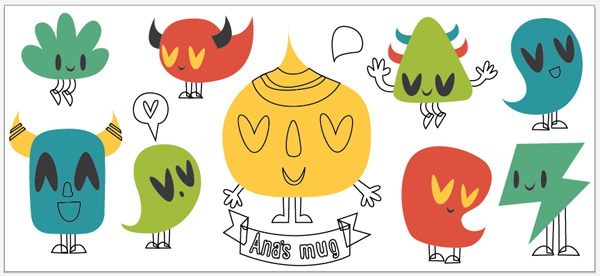
At this point our illustrations should look like this.
Step 5
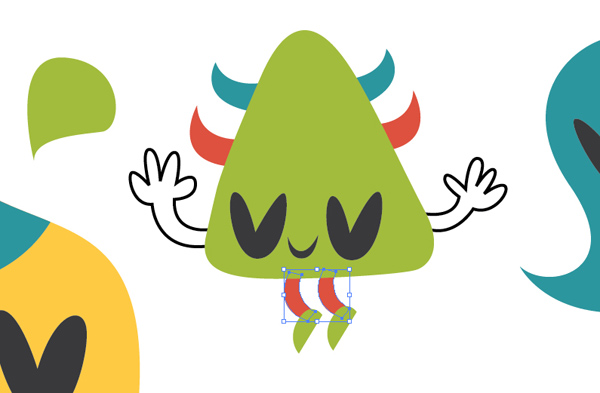
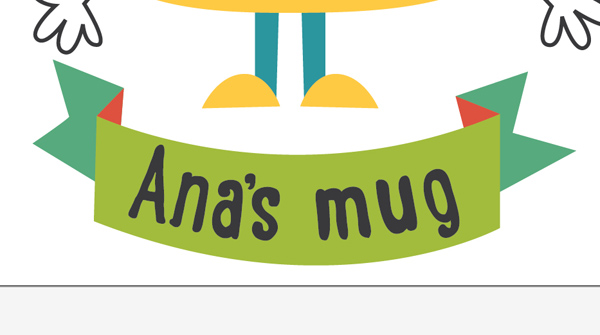
Now, let’s add color to our last element, the name banner.
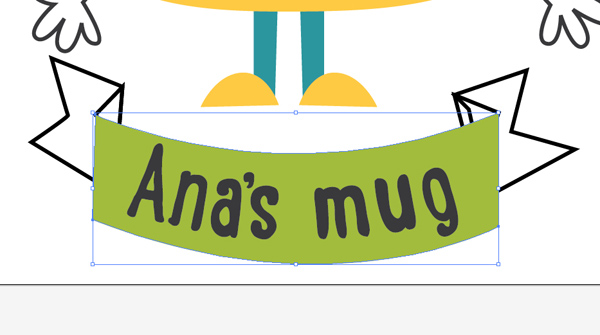
Use light color for the front part, darker one for the back part, and darkest one for the middle part. That way we’ll get the right perspective and depth in our 2D illustration. We are using the dark gray (90% gray) for the letters.
5. Add Details
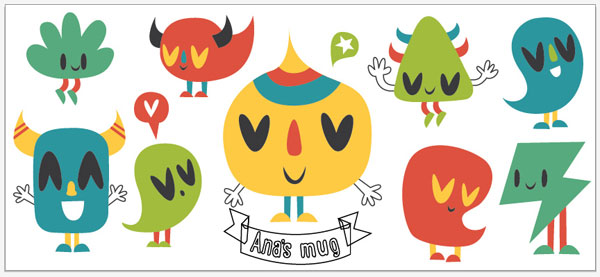
Our illustration should look like this. But, we have still much white space! Let’s fill it up with some confetti-like shapes!
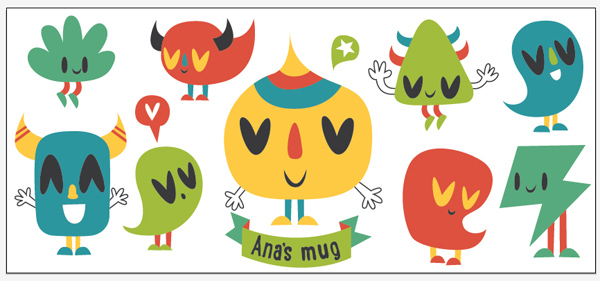
Step 1
Outside the artboard, using the pen tool draw four simple triangles and four simple circles. Color them in some of the colors from our color palette.
![78]](https://harisinwijaya.files.wordpress.com/2014/10/78.jpg)
Step 2
Now using the copy and paste command, replicate them, let’s say five times. Now we have lots of vector confetti to throw around our monsters!

Step 3
Start randomly arranging the circles and triangles around the monsters.
Step 4
Don’t stop until you fill most of the blank space. Your illustration should look something like this! It’s funny how few simple colorful shapes can brighten up a drawing!
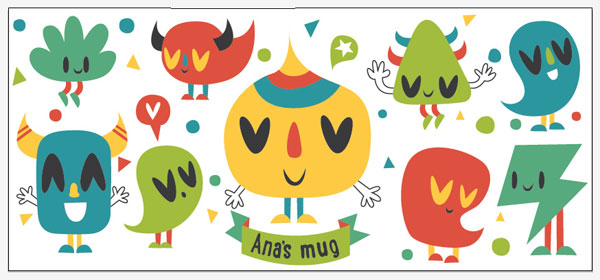
6. Add a Subtle Texture to Shapes
Now for our final touch, let’s add a discreet outline texture to our monsters. It won’t be noticeable at first sight, but it will add a dose of retro charm to it.
Step 1
Select the main monster body. Open the Brushes panel and in the options menu, find the Open Brush Library. Click on it, and you will get brush sets in various categories.
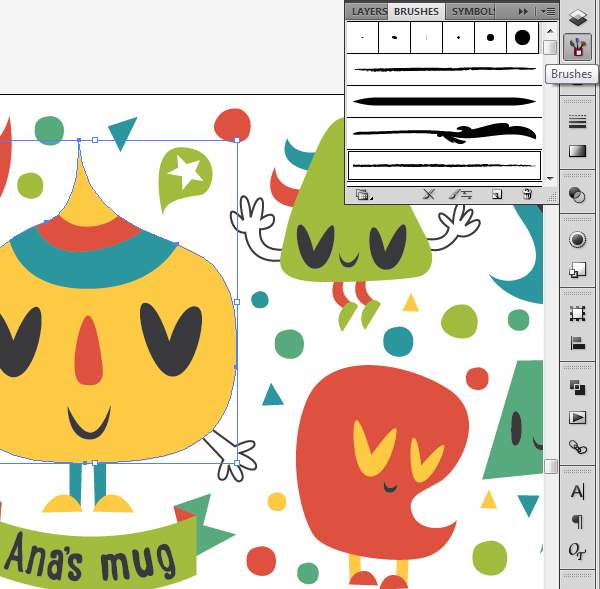
Step 2
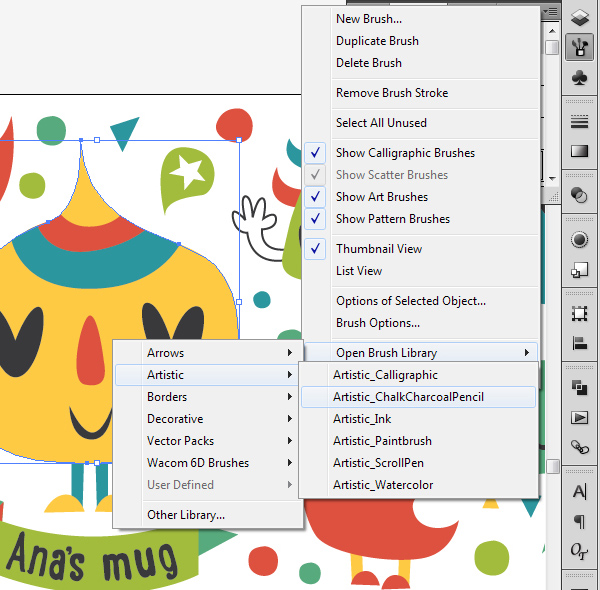
Open the Artistic category, and select the Chalk Charcoal Pencil subcategory.
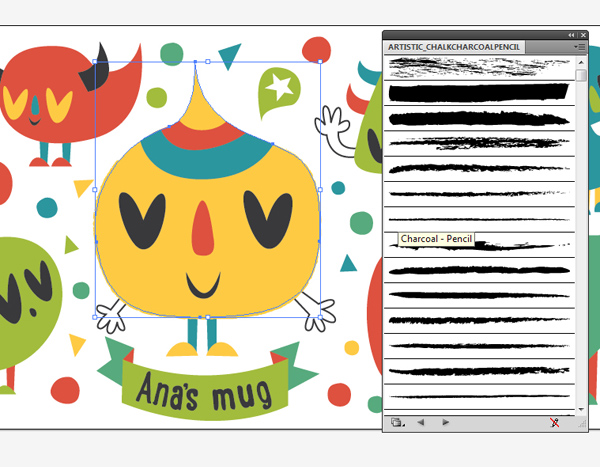
Step 3
You will get a library of rough brushes. Select a suitable brush. I will use the one labeled as Charcoal Pencil. You see the effect of the stroke brush – subtle yet very appealing.
Step 4
Repeat the same step for all other monsters bodies.
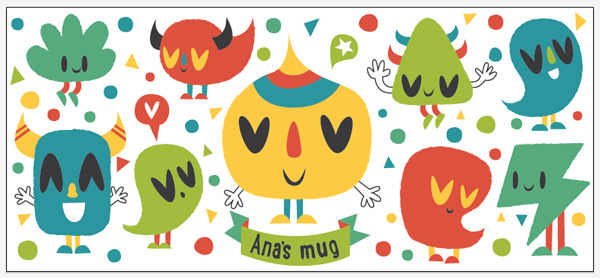
Sit Back and Relax, You’re Done!
And we are done! Our illustration is ready for printing. Take it to your local print shop and get your very own, one of a kind mug!
But before you run off to the print shops, I have one very important tip regarding printed mugs: never, ever wash them in a dish washing machine. The print will fade and eventually it might fall off. Always hand-wash them. Enjoy your coffee!

