
1. Build the Mouth
Step 1
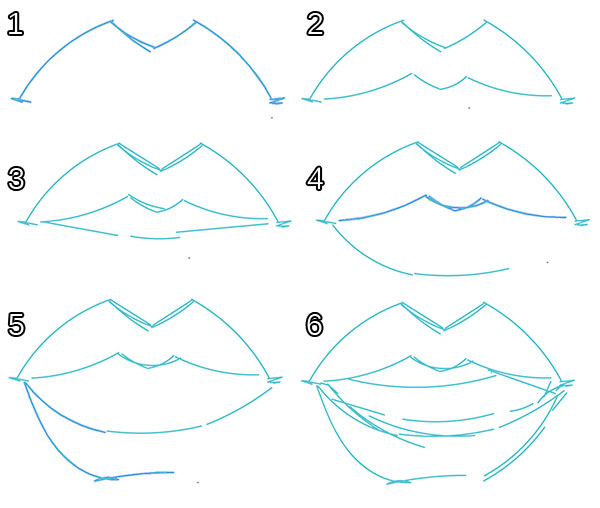
Let’s start with the mouth. It’s the top of the image and where the viewers’ eyes will likely fall first. To begin, sketch out the mouth with the Pencil Tool (N). I’m using a 1pt weight stroke with the color set to a light blue (this is not important).
- I usually start with the top lip. I think of it as four curved strokes: two on either side that curve inward and two shorter stroked that form the cupid’s bow.
- To complete the top lip I drew four strokes. The two side strokes curve in opposition to the top lines. The lines below the cupid’s bow mimic them on a smaller scale.
- Choose how open you want your mouth to be. Just a little bit, as seen in Figure 3 below.
- Or you can go for a mouth that will reveal more teeth.
- The bottom lip flattens out a bit in the middle of the bottom edge.
- Complete the mouth. Note where the teeth are (is it a closed smile, open smile, etc). Group (Control-G) these lines together.
Step 2
Let’s build up the mouth with shapes.
- Starting with the top lip, again, I want to focus on one half of it. Using the Pen Tool (P), I have traced the left half of the mouth, stopping in the center point and making sure the shape is closed.
- Copy (Control-C) and Paste (Control-P) the lip shape and Reflect over a Vertical Axis. align the two shapes so they overlap a bit and create a nice top lip.
- Repeat for the bottom lip.
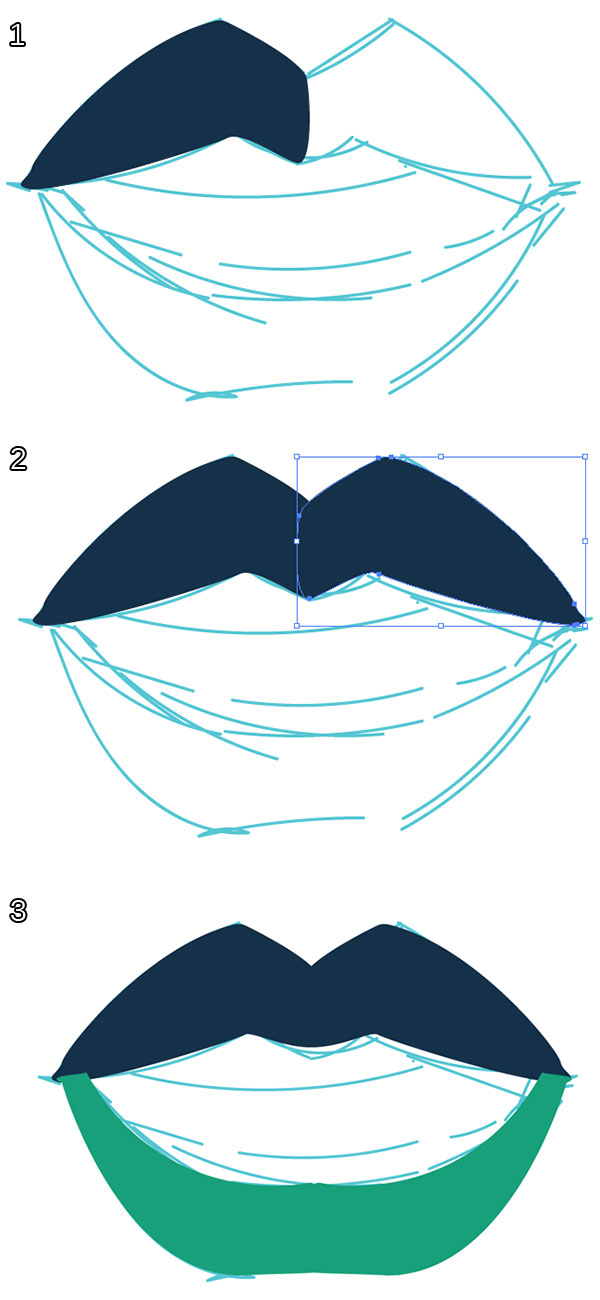
Step 3
Unite the top lip shapes and the bottom lip shapes in the Pathfinder panel with their respective partners.
- In order to create the teeth, use the Pen Tool to draw a curved shape defining the bottom edge of the top row of teeth.
- Use the Rounded Rectangle Tool in order to draw a row of teeth overlapping the blue space from the previous step.
- Use the Shape Builder Tool (Shift-M) in order to delete the rounded bottoms of the teeth. Select the blue shape and each tooth, Select the portion of the teeth shapes that do not intersect with the blue shape, Deselect, and Delete.
- Some of the teeth may sit above the lips themselves. Make sure to delete non-overlapping components of teeth before Grouping them together and placing them below the top lip in the Layers panel.
- Move the teeth group down a small bit so the blue shape from Figure 1. Draw a rounded tongue shape (with the Ellipse Tool (L)) and place it under all mouth objects in the Layers panel.
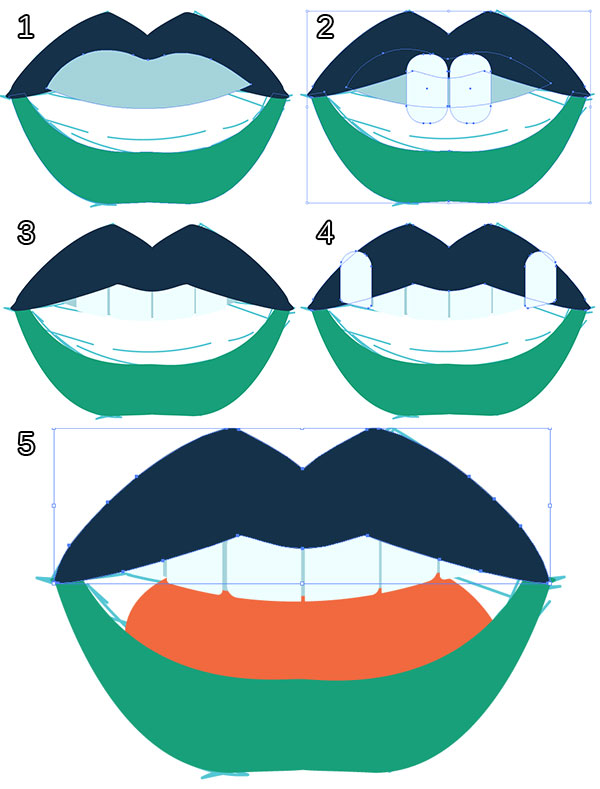
Step 4
Create a bottom row of teeth in the same manner as the group from Step 3.
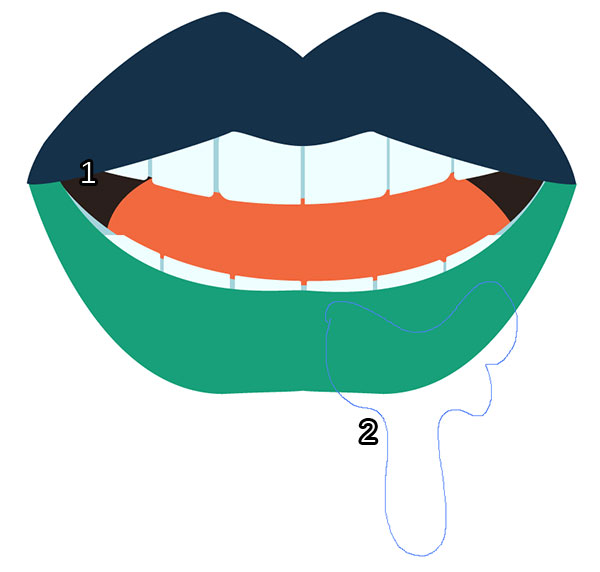
- Your mouth will need a dark color drawn for the inside as well (behind the tongue). I drew shapes behind the mouth in dark brown with the Pen Tool.
- The drip shape seen in the final image is the same teal as the lower lip and was drawn with the Pencil Tool. Optionally, you can also build rounded drip shapes with a series of ellipses, rounded rectangles, or carefully using the Pen Tool.
Group together your mouth components.
2. Create the Umbrella
Step 1
Before we get to the umbrella, let’s quickly create a rainbow. Use the Rectangle Tool (M) in order to draw a long, narrow, vertical rectangle. Copy and Paste five times. I’ve used the following colors:
- Orange: R=241 G=105 B=63
- Yellow: R=251 G=193 B=96
- Light Green: R=151 G=203 B=121
- Green: R=102 G=170 B=123
- Light Blue: R=85 G=198 B=212
- Navy Blue: R=21 G=49 B=73
- Align the rectangles so they are the same distance apart, Group them together and place them underneath the mouth (and all other poster elements).
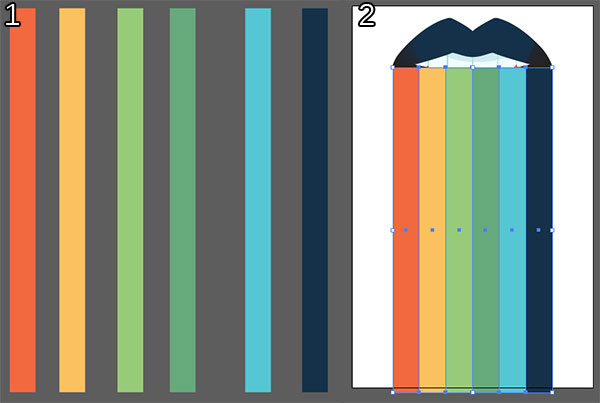
Step 2
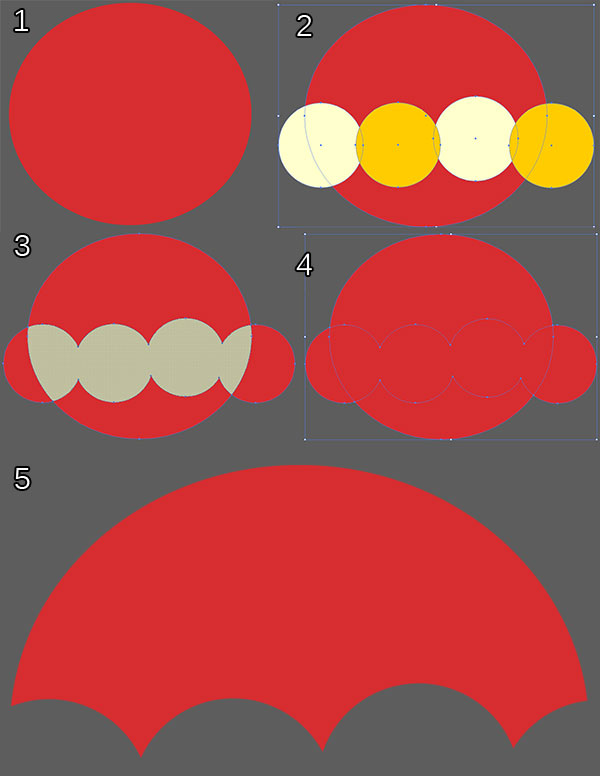
It’s pretty simple to create an umbrella from a series of ellipses.
- Draw a large ellipse using the Ellipse Tool. Note that this isn’t a perfect circle.
- Draw four overlapping circles and Unite all four in the Pathfinder panel.
- Using the Shape Builder Tool, select the intersecting an non-intersecting shapes that you’ve drawn (five total).
- The four bottom shapes, now separate from each other, are to be deleted.
- Once those other four sections are deleted you’ll be left with your umbrella.
Step 3
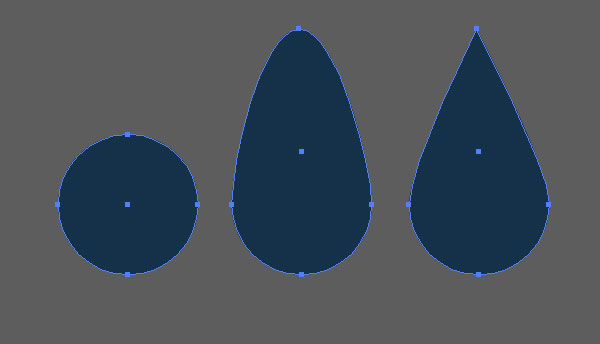
The top of the umbrella, the ferrule, has a pointed teardrop shape. It’s extremely simple to create. Draw a circle, pull the top anchor point upward using the Direct Selection Tool (A), and bring it to a point with the Convert Anchor Point Tool (Shift-C). Place on the top of the umbrella.
Step 4
For the handle of the umbrella, use the Pen Tool to draw a line that starts at the top of the umbrella and kicks to the left beneath it. Set the stroke weight to 8-10pts and taper the line with the Width Tool (Shift-W).
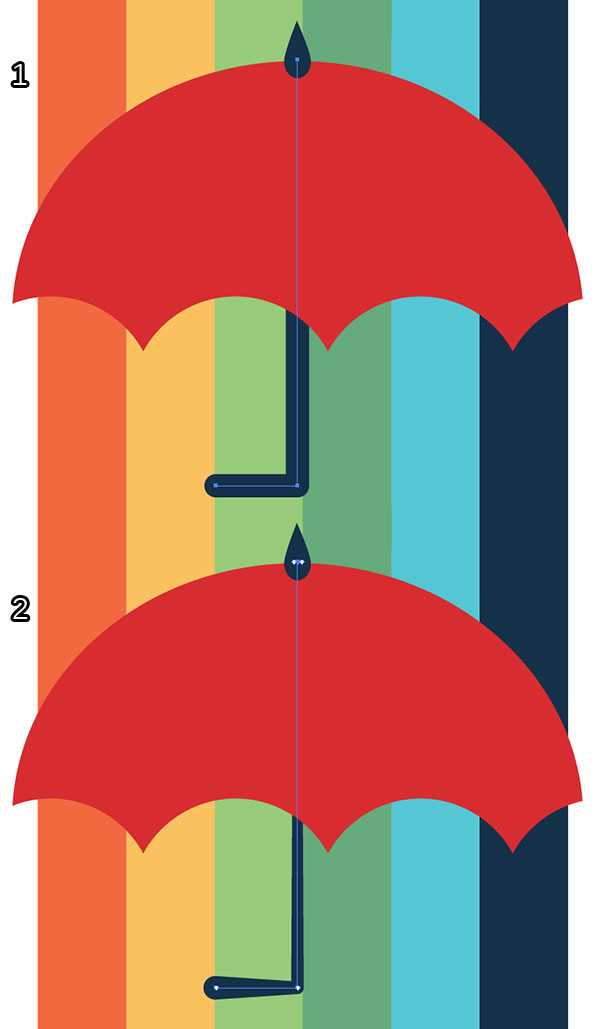
Step 5
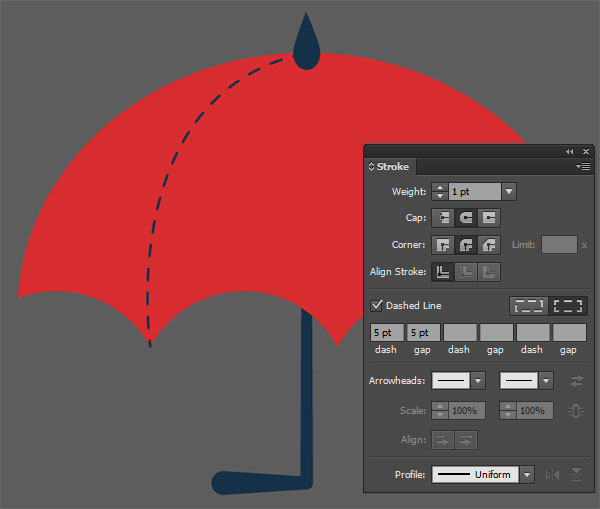
Finally, for the stitched lines on the umbrella, draw curved lines from each umbrella point to the ferrule. Set the Stroke Weight to 1pt, Cap and Corner to Rounded, and Dashed Line to 5pt Dash and 5pt Gap. Group all of these umbrella components together.
3. Sunshine and Rain Clouds
Step 1
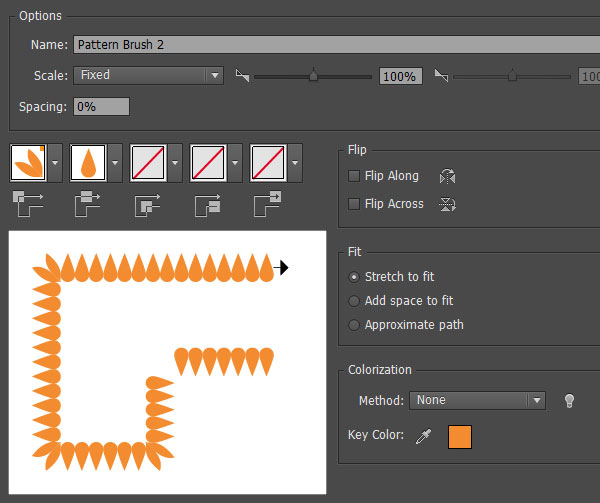
In order to create the smiling sun for our poster we need to start with the sun’s rays. Draw another pointed teardrop shape in yellow-orange (see Section 2, Step 3). With the teardrop selected create a New Brush in the Brushes panel. This is a simple Pattern Brush (see below) where the Outer Corner Tile is Auto Between and the Side Tile is Original. Hit OK and you’ll find your new brush ready for use in the Brushes panel.
Step 2
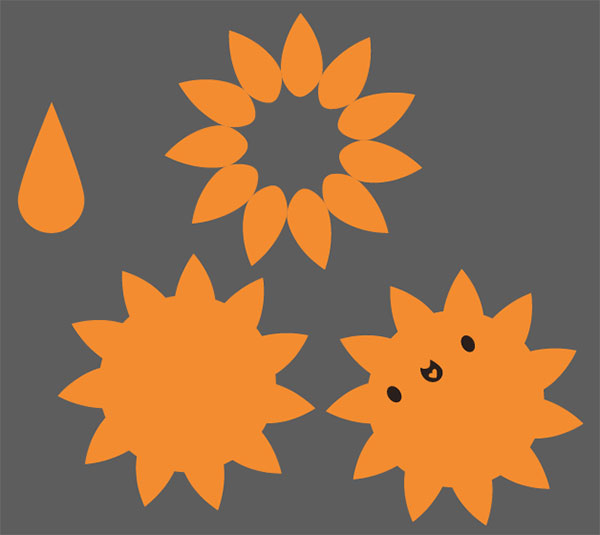
Use the Ellipse Tool to draw a circle. Fill it with the same color as the brush you just made. Apply the brush to the stroke and resize both the circle and the Stroke Weight as needed to get the amount of rays you’d like on your cute little sun.
For the face draw ovals for the eyes and use the Pen Tool to draw a mouth and little heart for a tongue, if you so desire. Group these pieces together and place the sun behind the umbrella within your poster’s composition.
Step 3
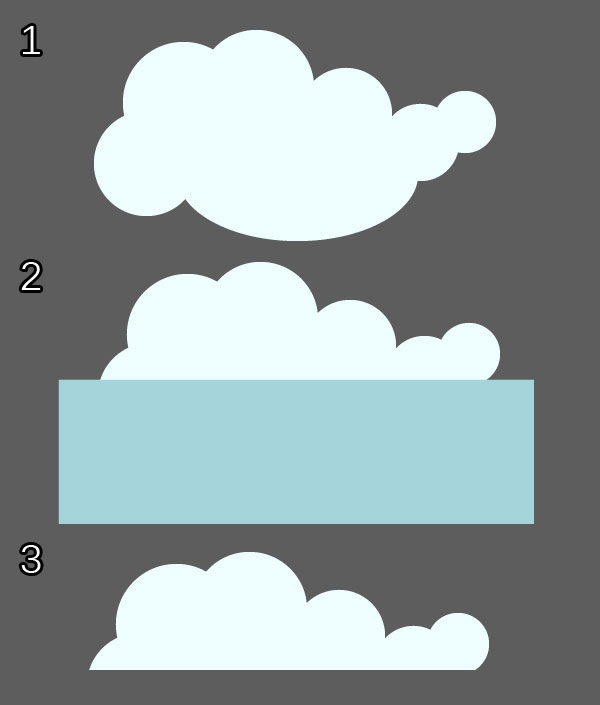
- For the rain clouds, use the Ellipse Tool to draw a series of overlapping circles and ovals in various sizes. Unite them in the Pathfinder panel.
- Use the Rectangle Tool to draw a rectangle that overlaps half of the cloud.
- Hit Minus Front in Pathfinder so you’re left with a puffy cloud with a flat bottom edge. Copy, Paste, and Reflect the cloud. change the fill color on the second cloud to a dark color and place it behind the first. Use the same teardrop shapes from Section 2, Step 3 for the raindrops in the poster design.
4. Render the Rainbows and Composition
Step 1
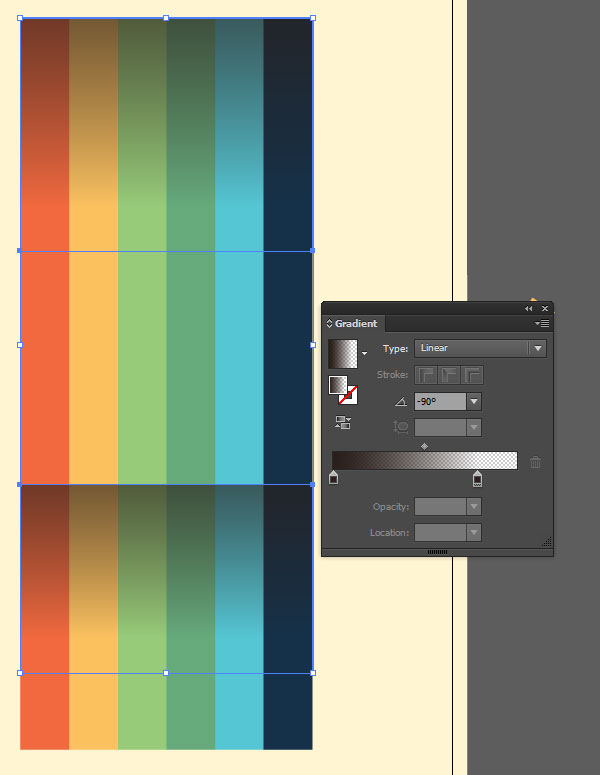
Use the Rectangle Tool in order to draw two rectangles that will appear beneath the mouth and umbrella. Each will have the same width as the rainbow. Apply a Linear Gradient using the Gradient Tool (G) that goes from dark brown at 100% to 0% Opacity. Set the gradient’s angle to -90° so the darker color starts at the top of the gradient shape.
Step 2
Let’s take a minute to check out the composition so far. Notice that the same gradient was applied to the mouth corners and tongue from the previous step.

Step 3
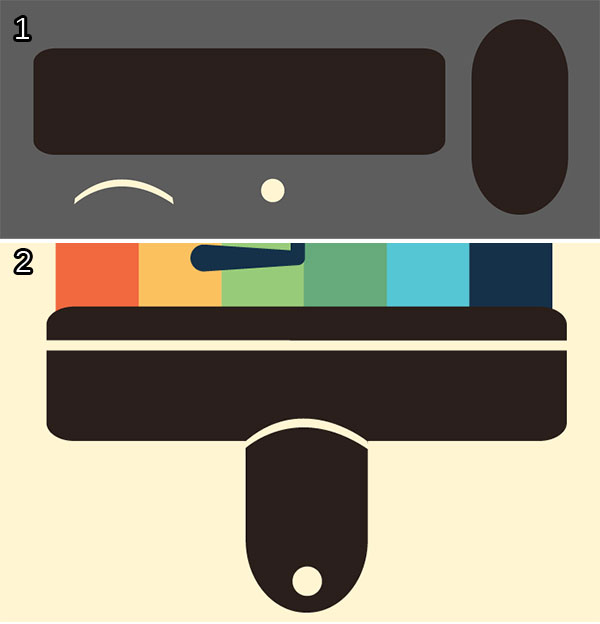
In order to create the paintbrush handle at the bottom of the poster, check out the following:
- The handle and the base of the brush are both Rounded Rectangles. A circle forms the hole in the handle and the half circle strip on the handle was drawn with the Pen Tool.
- Place the brush at the bottom of the rainbow and draw a narrow rectangle (also cream-colored, as that is our background color) across the top of the brush.
Step 4
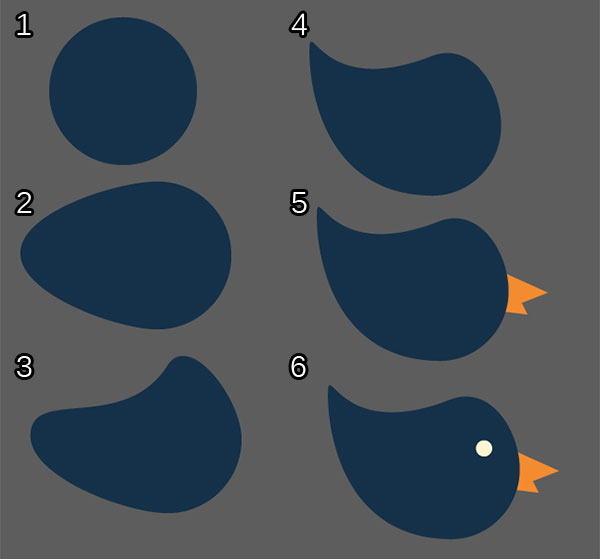
Finally, we’ve got to draw some little birdies.
- Start with a circle.
- Pull the left anchor point out with the Direct Selection Tool.
- Manipulate the top and left anchor point tools to form the head and tail (you’re curving the former circle up and inward).
- Bring the curved left side to a point.
- Use the Pen Tool to draw a beak.
- Draw a circle for the eyes. Group together, Copy, Paste, and Scale the copied birds down or up, depending on your preference and scatter them around the left side of the composition. Change the bird’s base color so there’s more than just navy blue birds flitting about.
5. Add a Patterned Texture
Step 1
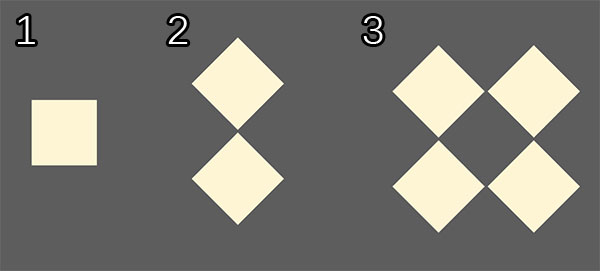
In order to create the patterned texture over top the whole poster, we’ll start with a couple squares.
- Use the Rectangle Tool to draw a perfect square (hold down Shift). Ultimately, my pattern will be in navy blue. For visibility’s sake, it’s cream right now.
- Copy and Paste the square and Rotate them so you can Align them to their center points.
- Copy and Paste the squares again so you have a group of four, as seen below.
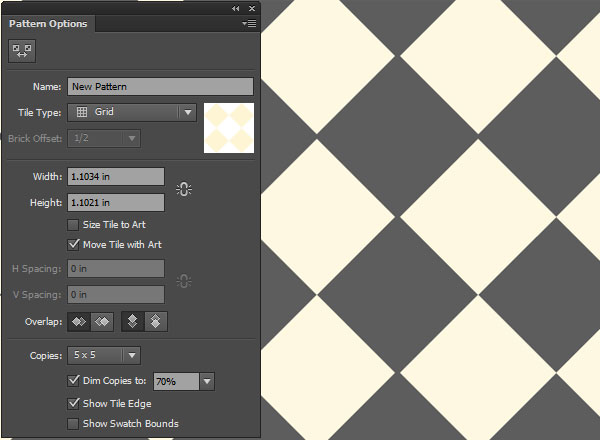
Step 2
Select your squares and Make a New Pattern in the Pattern Options panel. Keep the pattern type as a simple Grid. When satisfied, hit Done.
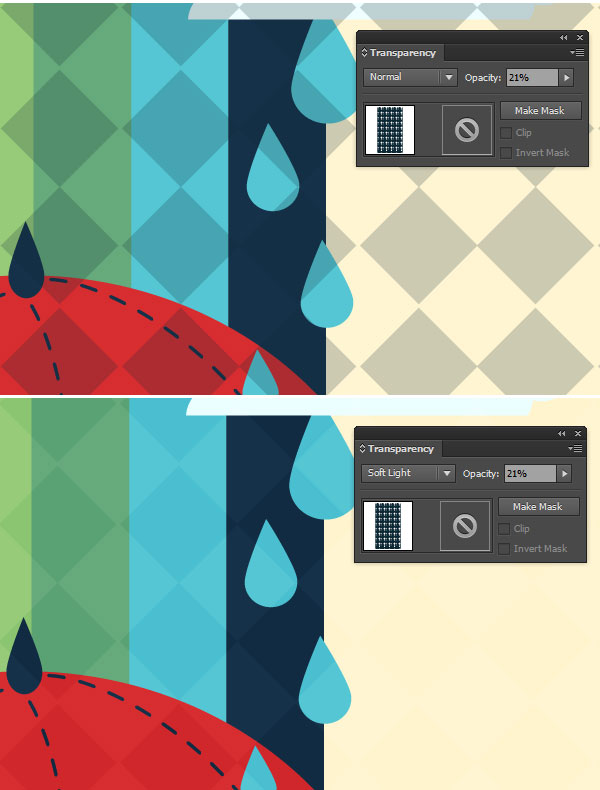
Step 3
Draw a large rectangle that covers the entire artboard. Apply your new pattern and reduce the Opacity to 21% or so in the Transparency panel. Change the Blending Mode to Soft Light.
Congratulations, Your Poster is Complete!
When creating surreal poster designs, it’s helpful to keep a list of items, objects, and concepts at hand. Doodle out designs and throw them together with a unifying palette.
