In this Inkscape quick tip, we’re going to go over a neat object menu option called Objects to Marker. It’s a really neat way to use custom designs if the prepacked ones just don’t cut it. Let’s jump right in!
1. Objects to Marker Explained
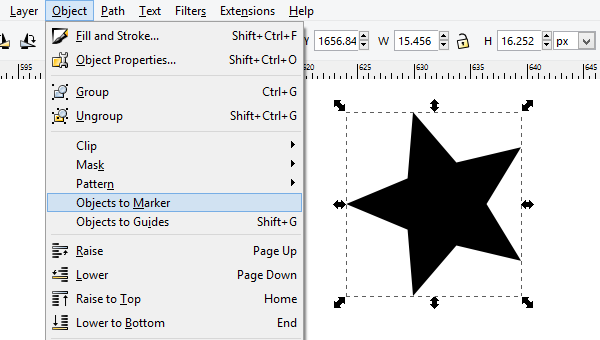
Step 1
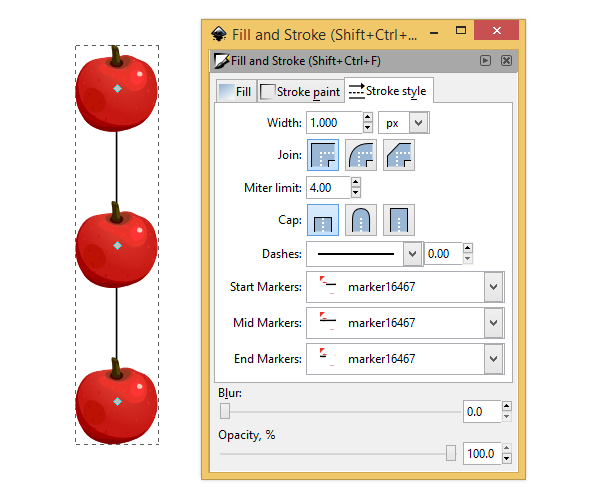
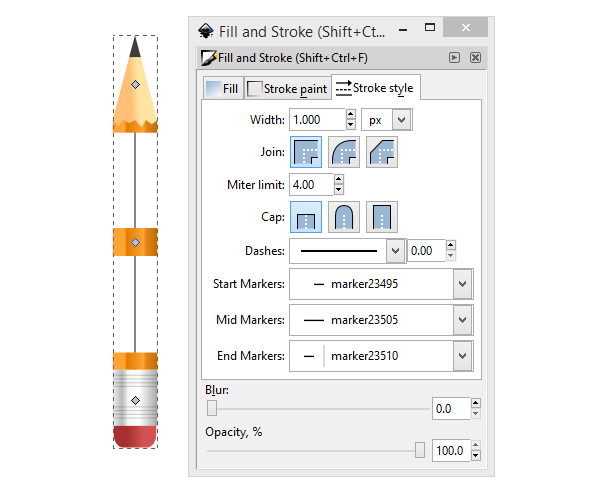
Well, if you’ve ever worked with markers in Fill and Stroke’s Stroke style options, then this will look familiar to you. You simply select Start, Mid, and End Markers – which are graphics applied on nodes.

Step 2
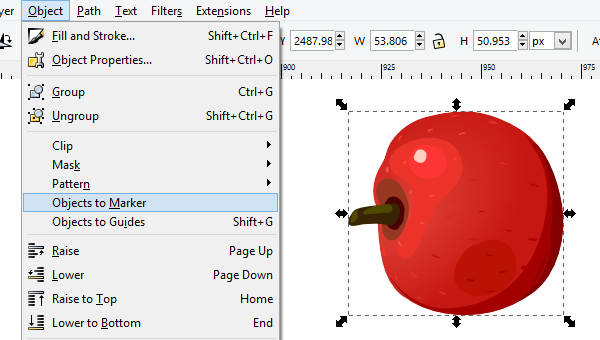
Inkscape comes with a bunch of prepacked shapes, but Objects to Marker allows you to use any custom object as a marker. Below, I’m going to turn a star into a marker by selecting it and heading up to Object > Objects to Marker. You’ll notice that your object will then disappear.
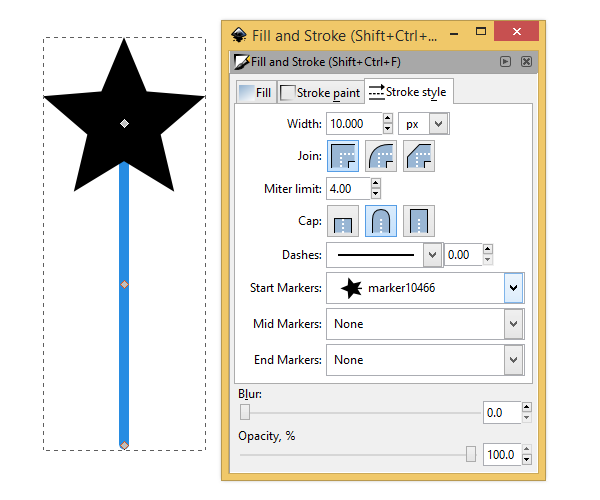
Step 3
Now is the time to go over to Fill and Stroke and open up the marker drop-down menu for your custom marker. For me, it never shows up the first time. I always end up having to expand the drop-down menu, close it, then open it up again to get it to refresh and display my custom marker as an option. Also, I have to do this with all three drop-down menus every time I add another marker.
2. Add Your Own Style to Custom Markers
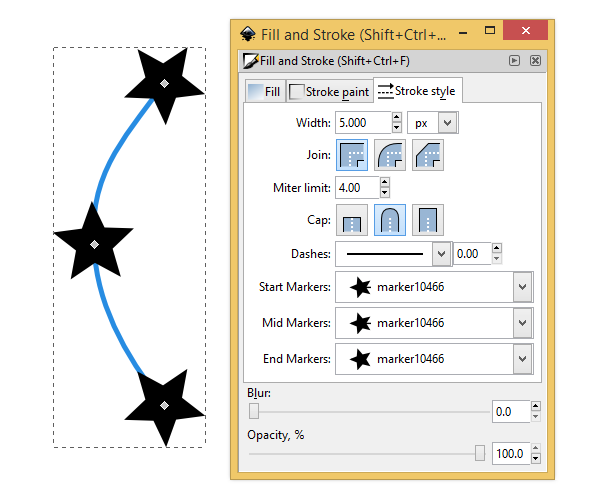
Step 1
I went ahead and added my custom star marker on all of the markers. Also notice that when you change the width of your stroke, the size of your markers will change drastically (it’s almost a little annoying). If you need a bigger stroke with smaller markers, you’ll have to redo your Objects to Marker with a smaller scaled version of your object.
This is why you’ll see that almost all of the prepacked markers have a small, medium, and large version.
Step 2
And of course, you may want to change the color of your markers after the face. Thankfully, there’s an Extension for this one. Select your path and click Extensions > Modify Path > Color Markers to Match Stroke.
Step 3
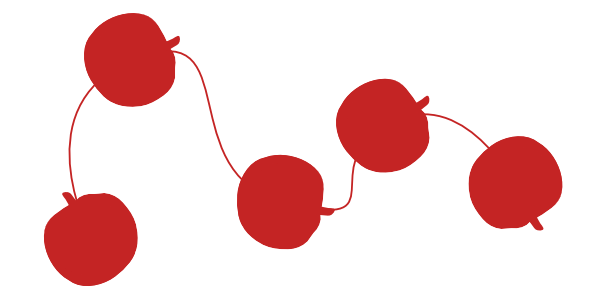
You can also use complex designs as markers. The red apple below is indeed sideways, but this is so it appears correct as a marker. I’ll show you what I mean next.
Step 4
Below, I drew a vertical line from top to bottom. That means my Start Marker is on the top and an upright apple set as a marker would actually be sideways. That’s why I tilted my apple accordingly prior to setting is as a marker. Lot’s of manual adjustments for directional sensitivity
.
Step 5
Yes, you can even Color Markers to Match Stroke on complex objects.
3. Extend a Mid Marker Along a Stroke
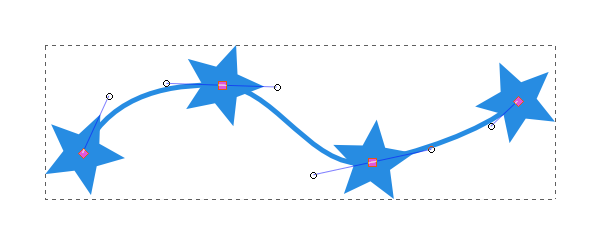
Step 1
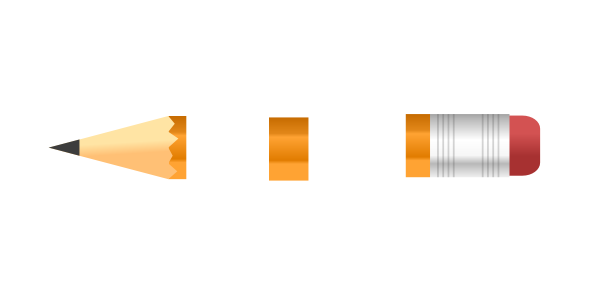
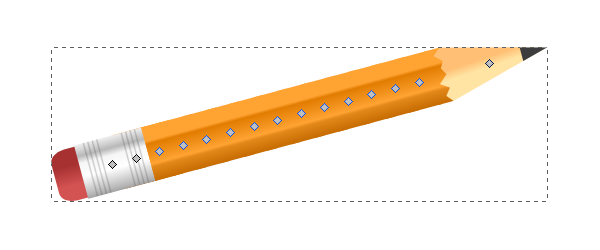
Below, I’ve arranged three separate parts of a pencil that I’ll be using as markers.
Step 2
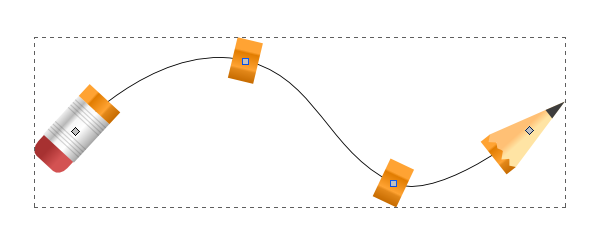
Now I’ve drawn my line and applied the markers as you can see below.
Step 3
Finally, we just keep adding more middle nodes to let those MidMarkers fill in the gaps. Pretty cool, huh?
Step 4
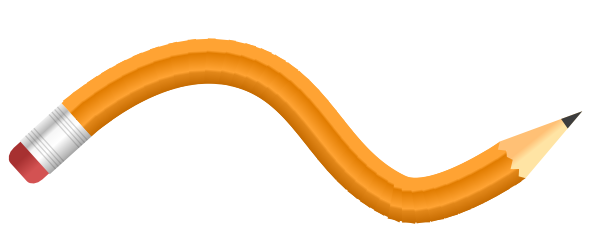
Of course, we could start out with a crazy line like this as well.
Advertisement
Step 5
Then we’d end up with a crazy pencil!
This Marks the End!
Now you know how to completely use Objects to Marker. It’s really easy and super fun to play around with, as you can see. Whether you need custom markers for professional projects, or you just want to make a crazy pencil, Objects to Marker is just what you needed. Thanks for reading!
