
Create a simple, shape-driven floral pattern with Adobe Illustrator. Use polygons to make each of the pattern’s elements, distort them with vector effects, and use the Pattern Options panel in order to bring your design together.
1. Let’s Draw a Tulip
Step 1
Start with the Ellipse Tool (L) and draw a small circle. Use the Direct Selection Tool (A) to pull the top anchor point upwards. You have a few options here: keep the top rounded, use the Convert Anchor Point Tool (Shift-B) to bring it to a point, and/or use the Selection Tool (V) to squish the now teardrop-like shape down so it’s smaller and fatter. The shape you choose will be the basis for your tulip’s petals.

Step 2
Copy (Control-C) and Paste (Control-P) your tulip’s petals twice. Use the Rotate Tool (R) to rotate both of the outside petals 20° and -20° respectively (you’ll want the tops to rotate outward). Select all three of the shapes and Unite them in the Pathfinder panel. Use the Delete Anchor Point Tool (-) to delete the bottom anchor points that are not in the center of the tulip (see below).

Step 3
For the stem and leaves, you’ll follow the same process from Step 1: draw a circle, pull the side anchor point out, and decide if you want the leaf’s tip to be pointy or rounded. The stem was drawn with the Rectangle Tool (M). Place it beneath the tulip’s head in the Layers panel. Copy and Paste your leaves and Rotate them as needed. Group (Control-G) your tulip’s components together and let’s move on to the next pattern element.

2. Let’s Draw a Daisy
Step 1
Daisies and petaled flowers like them are fairly simple. Using the Polygon Tool, draw an eight-sided figure. With your octagon selected, go to Effect > Distort & Transform > Pucker & Bloat. Move the slider to 76% Bloat.
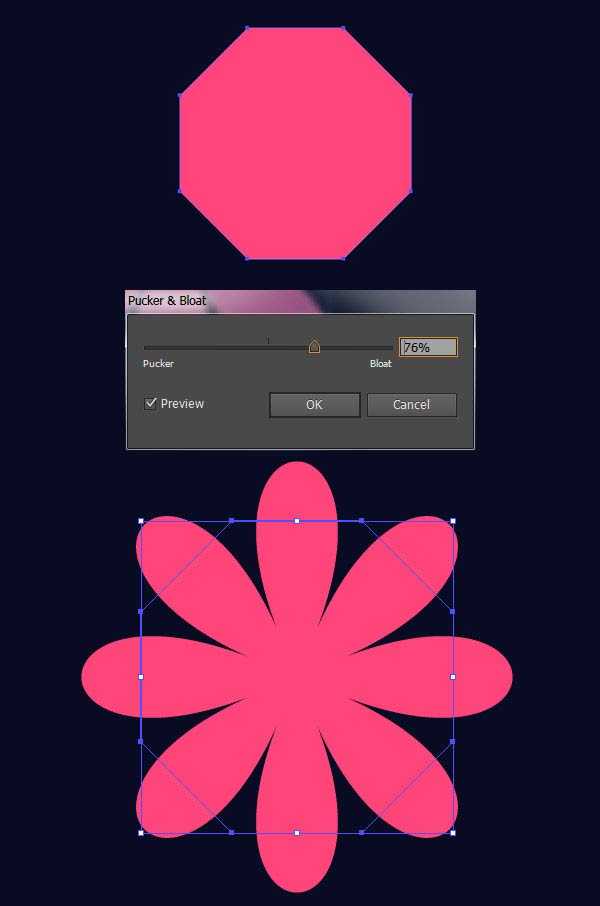
Step 2
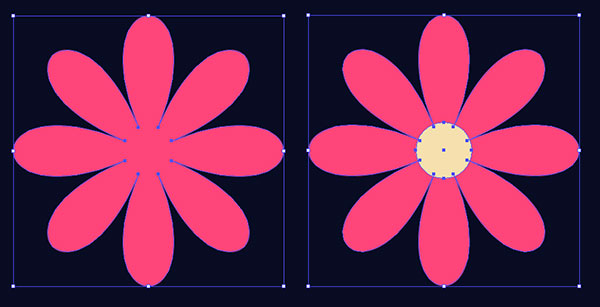
Hit Expand under Object and your daisy will be its very own shape. Use the Ellipse Tool to draw a circle for the flower’s center.
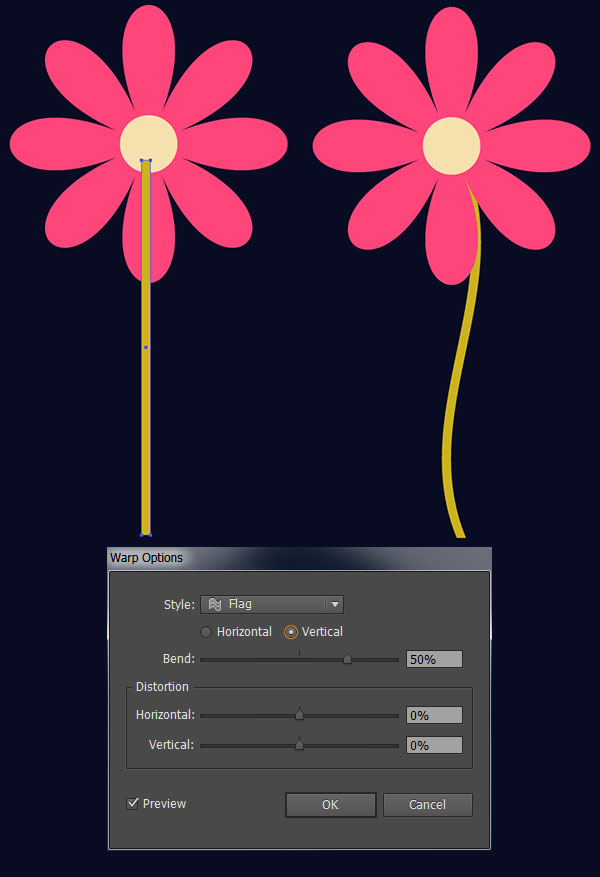
Step 3
For the stem, draw a long, narrow rectangle. Select the stem and go to Effect > Warp > Flag. In the Warp Options, select Vertical and push the Bend slider to 50%. Once you’ve hit OK, make sure to Expand under Object and place it under the flower’s petals in the Layers panel.
3. Creating Other Flowers
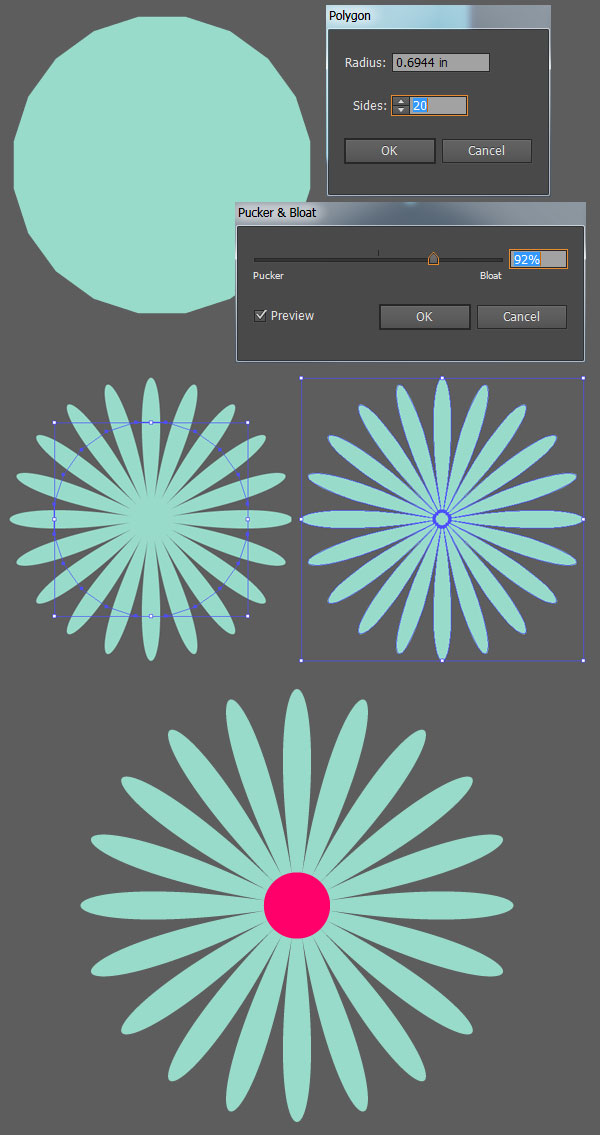
Step 1
This next one is another daisy. Instead of eight sides, however, choose 20 sides. Once again, apply the Pucker & Bloat effect at 92% so the petals are plentiful and thin. Don’t forget to Expand your flower under Object and draw a circle for the flower’s center.
Step 2
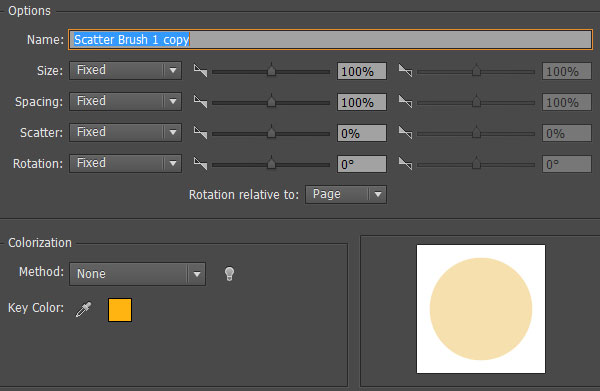
The next pattern element requires a quick custom brush. Draw a small circle with the Ellipse Tool. Select the circle and in the Brushes panel hit New Brush… and Scatter Brush. Keep its options set to Fixed, give it a unique name, and hit OK. Your new brush will be found in the Brushes panel.
Step 3
Draw a circle and set the stroke to your new brush (Select the circle and choose the brush in the Brushes panel). If you decide to change the color of your shape, you can edit the brush’s color under Edit > Edit Colors… > Recolor Artwork. Expand your flower shape and Delete any extraneous shapes (those that aren’t filled in) in the newly expanded group (take a gander at your Layers panel and keep it organized).

Step 4
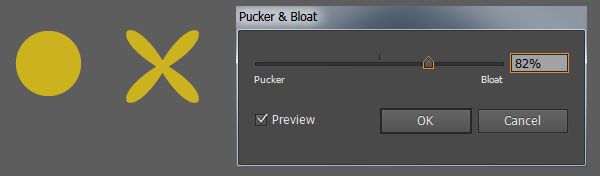
Another rather simple pattern element are these green clover-like shapes. Draw a circle and apply the Pucker & Bloat effect at 82%. Expand the shape under Object. These will be copied and pasted around the pattern design.
Step 5
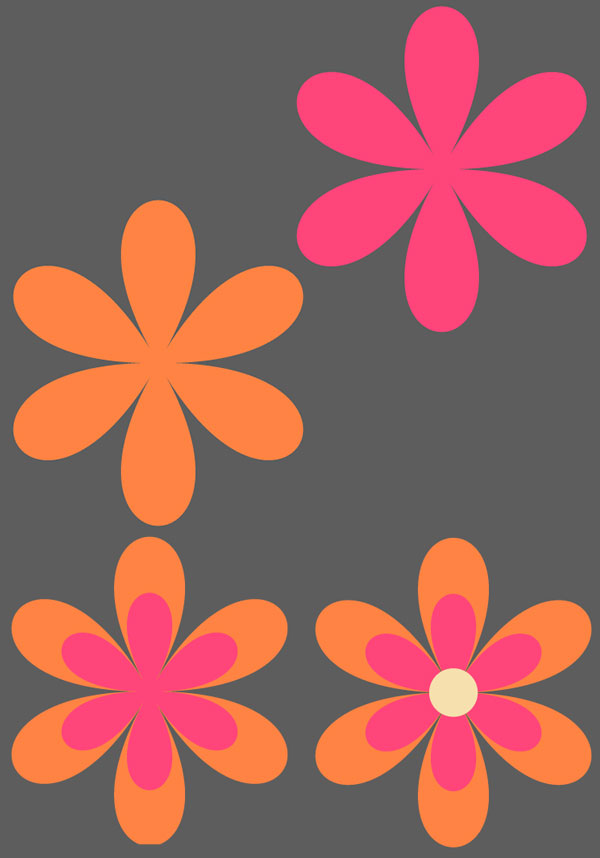
For the final flower of this design, we’re going to create a simple layered daisy. Draw a six-sided polygon and set the Bloat to 96%.
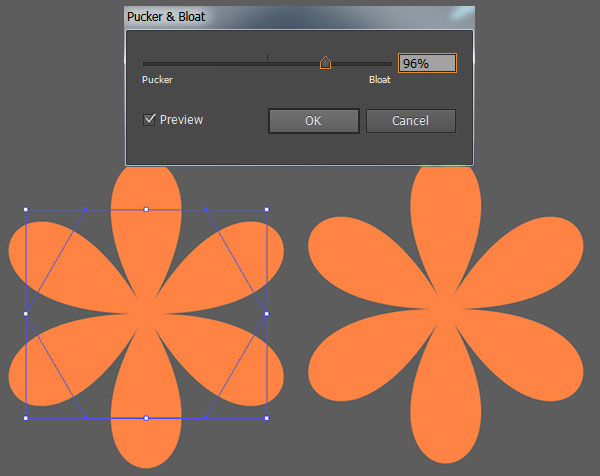
Step 6
Copy, Paste, and set the fill color to a contrasting, bright color on the copied flower. Scale the copied flower down so it’s about half the size. Place it on top of the original flower and draw a circle for the center. Group your components together.
4. Assemble Your Pattern
Step 1
Arrange your pattern components together in a pleasing way. I like to place them inside a rectangle and fill up the space as much as possible. Copy and Paste components around, recolor some of them, and don’t forget to add various sizes of circles.

Step 2
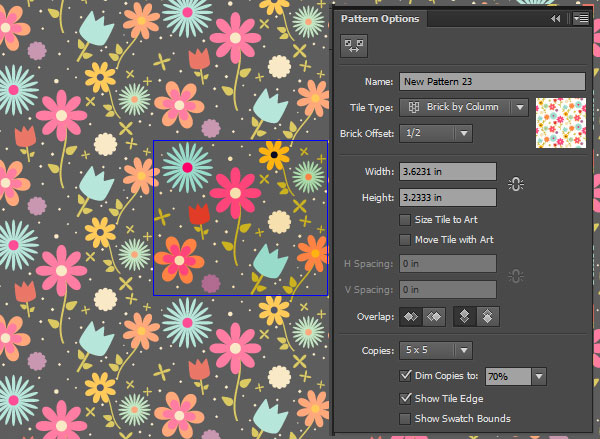
Select the components of your design and hit Make New in the Pattern Options panel. Note empty spaces in your pattern design and fill them in with other flowers, circles, sparkles, etc. Hit Done when you’re satisfied with your pattern, or to test it in action. You’ll find it saved in your Swatches panel and you can edit it at any time (or make a copy to edit) by Double-Clicking on the pattern swatch.

Step 3
As you’re filling in your design, Zoom (Z) out and notice how the pattern looks when repeating. Is it obvious that you’ve designed it in a rectangle? Or is the pattern seamless? I’ve changed the Tile Type to Brick by Column so its seams aren’t as easily seen. Note how the stems of the daisies play up the tile change by creating sweeping lines throughout the pattern.
Well Done, You’re Through!
Your pattern is now complete. With a handful of polygons you’ve made a field of flowers. Push your pattern designs further by creating more complex shapes and motifs with blends, gradient shapes, and gradient meshes.

